Since the 1960s, tie-dye has been a staple look kids and adults love to rock when the sun is shining and the music is blasting. Whether it’s a birthday party activity or just a fun way to pass the time, you can show the kids or party guests a great time by showing them how to tie dye their very own shirts.
Today, we’ll walk you through the process of how to make tie-dye shirts the easiest way possible for a fun and colorful activity that can be worn long after the day is over.
Ready to learn how to tie-dye a shirt? Here’s what you’ll need:
- White 100% Cotton Shirts
- Rubber Bands or String
- Tie-Dye Color Kit
- Extra Disposable Gloves
- Gallon Size Ziploc Bags
- Aprons or Old Clothing
- Newspaper, paper bags, or plastic trash bags.
- Tape
How to Tie-Dye a Shirt in Six Simple Steps
Step 1: Pre Wash the Shirts
Before you can start dyeing the shirts, you’ll need to pre-wash them. They will be ready for use once the wash is over, and there is no need to dry them before tie-dyeing.
Step 2: Set Up Your Tie-Dye Station & Mix Dyes
While your shirts are washing, set up your tie-dye station, covering up any surfaces you do not want to get stained with newspaper, paper bags, or plastic trash bags. We recommend taping these down so they do not move when you are working on tying up your shirt. Then, with your apron or old clothing you don’t mind getting stained and your disposable gloves, mix the dyes according to the instructions in the dye kit.
Step 3: Choose a Design & Tie Your Shirt Accordingly
Once your shirts are pre-washed and your tie-dye station is set up, it’s time to pick a tie-dye design and band your shirt accordingly. Unless you make your own dye colors from scratch, the tie-dye kit you are using to make the shirts should come with design instructions. Nevertheless, we’ve included three of the classic tie-dye design styles below.
Photo Courtesy of S&S Blog
Step 4: Start Tie-Dyeing!
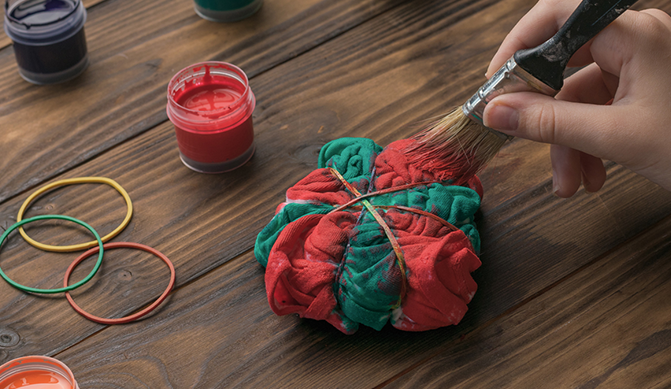
With your shirt securely in place with rubber bands or string, it’s time to have some fun! Follow a specific color scheme or your trusty favorites, or let your imagination run wild by mixing colors; the choice is yours!
Step 5: Let the Dye Set
Once you’re happy with your dyed shirt, it’s time to let it sit for six to eight hours or overnight. The fabric should remain damp enough to absorb the colors, so keep it out of direct sunlight. While waiting for your new shirts to set, pass the time with play or exercise time on We Sell Mats™ Sensory Floor Mats, or supportive Fitness Mats!
Step 6: Rinse & Wash
After allowing your tie-dye shirt to absorb the dye, remove the rubber bands and reveal the beautiful pattern inside! Then rinse, wash, and dry the shirt based on the instructions from the tie-dye kit and show off your tie dye-ing talent all summer long!
Now that you know how to make tie-dye shirts consider all the ways you can make tie-dye shirts part of your summer fun! For instance, you could create tie-dyed team shirts to wear for all of the Fun Summer Backyard Games You Can Enjoy With Your Family, with both teams sporting their own combination of colors.
No matter how you use your new tie-dye shirts this summer, We Sell Mats™ is ready to help you have fun in comfort and style with our incredible selection of exercise and play mats ideal for the gymnast, judo-master, or that garage you’ve been wanting to transform into your own at-home gym. Shop today and discover your new favorite mats perfect for a summer of fun and fitness!


